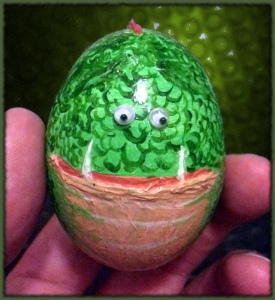
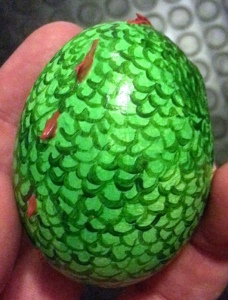
Still with the creepy, Halloween theme, we have the Swamp-Beast Egg.
It was going to be Cthulu, but everyone knows that Cthulu has tentacles. If you want to get all Lovecraftian, it could possibly be a Deep-One Egg. I’ve also heard it being called a Dragon-Egg. Whatever.
Preparation
Find a fat, rounded egg, so that Swampy looks like he’s had a healthy fish diet. Get boggly eyes (makes everything cuter) and some impasto medium.
Undercoat as described earlier, let it dry and then paint in a solid green. If you’re after a light-hearted beast, go for a bright, vivid green. A dark green will be decidedly moodier. As for his tummy, settle for a muddy mustard of river-bed brown. Two solid coats of that and let Swampy dry.
Get some white paint and mix it into some impasto. Using a slim paintbrush, scoop and roll it onto the egg about midway to form the teeth. Think goofy, clumsy canines jutting upwards.
Clean your brush out, let it dry, then mix red with the impasto. Scoop and roll a thick slab to form the lower lip, draping it across the teeth. Build it up and sculpt it with a knife or spatula if you need to.
As always, just ask for diagrams if you need them.
While you’ve got a blob of red impasto sitting there doing nothing, dip your paintbrush in and tease to form spikes on the back. Continue all the way down the back. If the spikes fall over, tease them back up again. They’ll hold when they’re dry.
Finishing
Let it dry, then mix some green in the impasto and build the lower portion of the mouth, and some eyebrows above where the eye will be. Thick, heavy eyebrows give an impression of brutishness, so be moderate if you want a goofy, rather than ugly or scary egg.
Stick on the eyes and let it dry: big and close for cute, small and wide for piggy.
When it’s all dry, pick up a fine brush, mix a different shade of green and make a succession of ‘scales’, little U shapes in rows, all the way around. This is the most time consuming part, so make sure you’ve got a coffee handy, especially if you’re doing a batch. You are doing this in batches, right? Everyone is going to want one!
Alright, so keep going around and around, making little U’s, alternative the position on each row. You can afford to get thicker at the back, where his scales would be larger, but as you near his face, scatter the scales and make them finer and smaller.
Mix some lighter tummy colour, and, using a fine brush, make horizontal lines.
Let it dry. Get some shiny gloss (he’s a swamp beast, he’s wet) and slather it all over him, going for at least two coats. I’m yet to find a proper egg cup for him, but that’s ok: He’s one of those eggs that likes to be picked up and held.


